Crispy Oven Baked Chicken Cutlets

Crispy oven baked chicken cutlets are a lighter, easier way to get golden chicken without standing over a pan of hot oil. The outside bakes up crunchy from seasoned panko breadcrumbs, while the inside stays tender because the chicken is thin and cooks quickly.
This recipe is perfect for busy weeknights, family dinners, meal prep, sandwiches, chicken salads, and quick pasta plates. You get the comfort of breaded chicken cutlets without the mess of deep frying or the greasy coating that can happen when the oil temperature drops.
The trick is using thin, even chicken pieces, a properly seasoned coating, and a hot oven. A wire rack also helps because air can move around the cutlets, keeping the bottom from turning soft while the top gets crisp.
What This Recipe Tastes Like
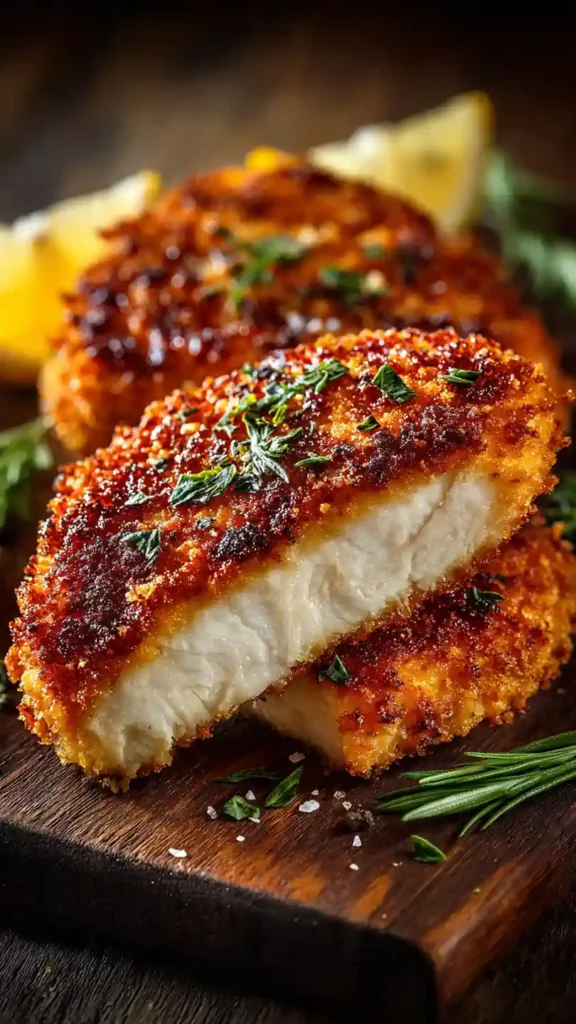
These chicken cutlets taste savory, crisp, and lightly cheesy if you use Parmesan in the coating. The panko gives the outside a crunchy texture that feels closer to fried chicken than regular baked breadcrumbs.
The chicken inside stays mild, juicy, and tender. Garlic powder, paprika, black pepper, and a little Dijon in the egg mixture add flavor without overpowering the chicken.
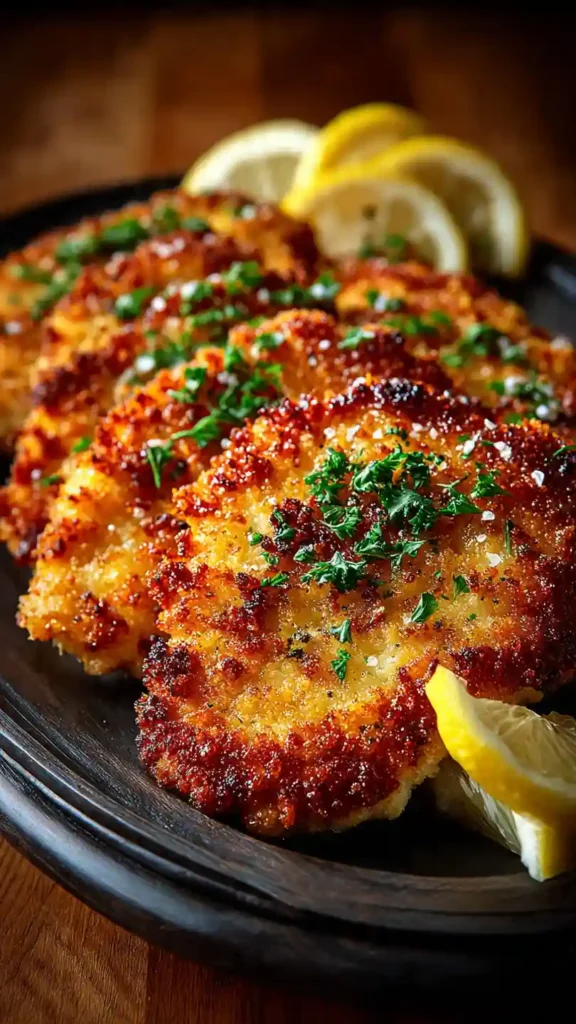
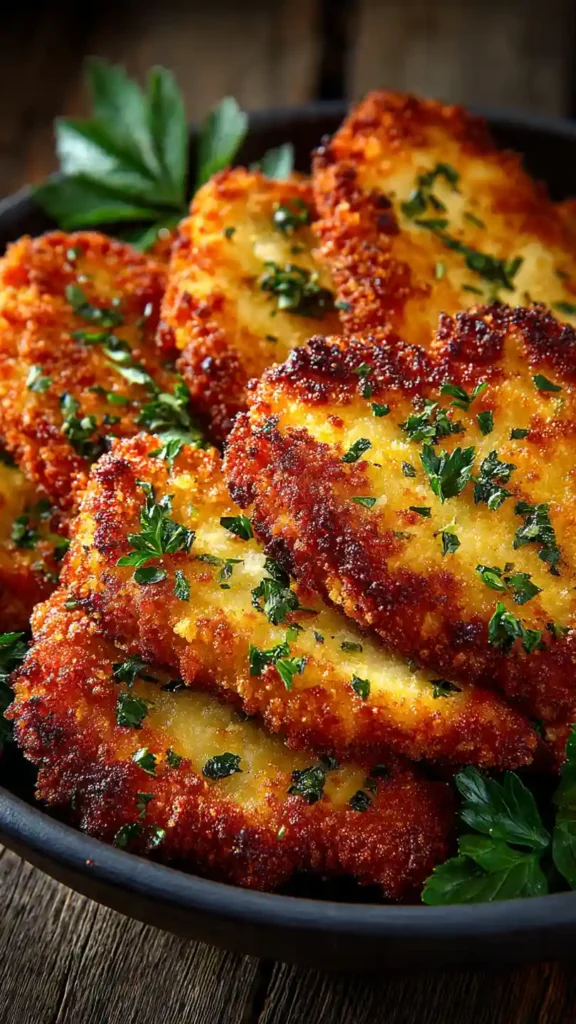
On the plate, the cutlets are golden and crisp around the edges. They work with lemon wedges, marinara sauce, ranch, honey mustard, pasta, salad, rice, roasted vegetables, or tucked into a sandwich roll.
Why You’ll Love This Recipe
- Less greasy than fried cutlets while still giving a crunchy bite.
- Crispy without deep frying because the oven and panko coating do the work.
- Weeknight-friendly with simple prep and fast baking.
- Family-friendly flavor that works with many sides and sauces.
- Great for meal prep because leftovers can be reheated in the oven or air fryer.
- Beginner-friendly with a clear breading method.
- Versatile serving options for salads, sandwiches, pasta, bowls, and wraps.
Best Occasions to Serve This
These crispy oven baked chicken cutlets are ideal for weeknight dinners when you want something quick and satisfying. They also work for meal prep because you can bake a batch and use the cutlets in different meals through the week.
Serve them for family dinner with mashed potatoes, roasted vegetables, pasta, or a simple green salad. They are also great for sandwiches with lettuce, tomato, and sauce.
For casual entertaining, slice the cutlets into strips and serve them with dipping sauces. They are easy to eat, familiar, and much less messy than frying right before guests arrive.
Kitchen Equipment You’ll Need
Large rimmed baking sheet – Gives the cutlets room to bake evenly without crowding.
Wire rack – Helps air circulate under the chicken so the bottom does not turn soggy.
Shallow bowls or plates – Makes the breading process easier and cleaner.
Tongs – Helpful for moving coated chicken without wiping off the breadcrumbs.
Meat mallet or rolling pin – Useful if you need to pound thicker chicken pieces into even cutlets.
Instant-read thermometer – The safest way to check that the chicken is fully cooked without overbaking it.
Parchment paper or foil – Makes cleanup easier under the rack.
Ingredient Notes Before You Cook
Chicken breast works best when sliced into thin cutlets or pounded to an even thickness. Thick chicken breasts are more likely to dry out on the outside before the center is cooked. Thin pieces bake faster and give you a better coating-to-chicken ratio.
Panko breadcrumbs are the best choice for crispiness. They are larger and lighter than regular breadcrumbs, so they bake up crunchier. Regular breadcrumbs can work, but the coating will be finer and less crisp.
Parmesan adds salty, savory flavor and helps the coating brown. Use finely grated Parmesan so it mixes evenly into the breadcrumbs. You can leave it out if you need a dairy-free version.
Egg helps the coating stick. A little Dijon mustard mixed into the egg adds flavor and helps the chicken taste more seasoned.
Flour creates a dry base layer so the egg can cling to the chicken. Without it, the coating may slide off in patches.
Oil or cooking spray helps the panko brown in the oven. Since the cutlets are not fried, the breadcrumbs need a little fat to become golden instead of dry and pale.
Step-by-Step Cooking Instructions
1. Preheat the oven
Preheat the oven to 425°F. A hotter oven helps the coating crisp quickly before the chicken has time to dry out.
Set a wire rack over a rimmed baking sheet. Lightly grease the rack so the coating does not stick when the cutlets are done.
2. Prepare the chicken cutlets
If your chicken pieces are thick, slice them horizontally into thinner cutlets or pound them gently until even. Aim for about 1/2-inch thickness.
Even thickness matters because thin ends can dry out while thick centers are still undercooked. Try not to pound the chicken so aggressively that it tears.
3. Pat the chicken dry
Use paper towels to dry both sides of the chicken. This helps the flour stick and keeps excess moisture from softening the coating.
Wet chicken can make the breading clumpy and uneven, so this small step makes a big difference.
4. Set up the breading station
Arrange three shallow dishes: one for flour, one for the egg mixture, and one for the panko coating. Season each layer lightly so the cutlets taste good all the way through.
Keeping the dishes in order makes the process faster and helps prevent messy hands.
5. Coat the chicken
Dip each cutlet into the flour first and shake off the excess. Then dip it into the egg mixture, letting extra drip back into the bowl.
Finally, press the chicken into the panko coating. Press gently but firmly so the crumbs stick to both sides. Do not just sprinkle crumbs on top; pressing gives the coating better coverage.
6. Arrange on the rack
Place the coated cutlets on the prepared wire rack with space between each piece. Do not overlap them.
Lightly spray or drizzle the tops with oil. This helps the coating turn golden and crisp in the oven.
7. Bake until golden and cooked through
Bake the cutlets until the coating is crisp and the chicken reaches 165°F in the thickest part. Thin cutlets usually take about 15 to 18 minutes, depending on thickness.
If the coating needs more color near the end, broil for 1 to 2 minutes, watching closely so the crumbs do not burn.
8. Rest briefly before serving
Let the chicken rest for 3 to 5 minutes after baking. This helps the juices settle and keeps the coating from falling apart when you slice into it.
Serve hot with lemon wedges, sauce, salad, pasta, or your favorite sides.
Pro Tips for Best Results
- Use thin, even chicken pieces. Uneven chicken is the main reason cutlets turn dry or cook inconsistently.
- Season every layer. A little seasoning in the flour, egg, and breadcrumbs makes the flavor better than seasoning only the outside.
- Use panko, not fine crumbs, for best crunch. Panko creates a lighter, crispier coating.
- Press the crumbs onto the chicken. This helps the coating stick instead of falling off after baking.
- Bake on a wire rack. The rack keeps the bottom from steaming against the sheet pan.
- Add oil to the coating. A dry breadcrumb coating will not brown as well in the oven.
- Check temperature early. Thin chicken can go from juicy to dry quickly.
- Use the broiler carefully. Broiling can add color fast, but panko can burn if you walk away.
Common Mistakes to Avoid
Using thick chicken breasts
Thick chicken takes longer to cook, which can dry out the coating and the edges. Slice or pound the chicken into thin cutlets before breading.
Skipping the flour layer
Flour helps the egg stick. Without it, the breadcrumb coating may slide off the chicken.
Not pressing the breadcrumbs on
Panko needs light pressure to attach well. If you only dip quickly, the coating may be patchy.
Crowding the pan
Cutlets need space for heat to circulate. If they are too close together, they can steam and soften.
Baking at too low a temperature
A low oven can dry the chicken before the coating crisps. A hotter oven gives better texture.
Overbaking
Chicken cutlets are thin and cook fast. Use a thermometer and pull them when they reach 165°F.
Variations & Substitutions
Parmesan Chicken Cutlets
Add finely grated Parmesan to the panko coating for a more savory flavor. This version is great with marinara, pasta, or a Caesar salad.
Spicy Chicken Cutlets
Add cayenne pepper, crushed red pepper flakes, or hot paprika to the breadcrumb mixture. Serve with ranch or honey mustard.
Italian-Style Cutlets
Use Italian seasoning, garlic powder, parsley, and Parmesan in the coating. Serve with lemon, marinara, or a simple tomato salad.
Gluten-Free Chicken Cutlets
Use gluten-free flour and gluten-free panko breadcrumbs. Check labels on seasoning blends to make sure they are gluten-free.
Dairy-Free Chicken Cutlets
Skip the Parmesan and use extra panko with herbs and spices. The cutlets will still bake up crisp.
Air Fryer Chicken Cutlets
Cook the breaded cutlets in a preheated air fryer at 380°F until crisp and cooked to 165°F. Work in batches so the basket is not crowded.
Chicken Tender Version
Use chicken tenders instead of cutlets. They may cook slightly faster, so check the temperature early.
What to Serve With This Recipe
Classic Dinner Sides
Mashed potatoes – Soft and creamy, perfect with crispy chicken.
Roasted broccoli – Adds a simple vegetable side with crisp edges.
Garlic butter pasta – Makes the meal more filling and works well with lemon.
Fresh Sides
Caesar salad – Crunchy romaine and creamy dressing pair well with crispy cutlets.
Cucumber tomato salad – Fresh and bright next to the warm chicken.
Coleslaw – Adds crunch and a cool contrast.
Sauces and Toppings
Lemon wedges – The easiest way to brighten the chicken.
Marinara sauce – Turns the cutlets into a quick chicken Parmesan-style dinner.
Honey mustard – A sweet and tangy dipping sauce that works well with the panko coating.
Ranch dressing – A family-friendly option for kids and casual dinners.
Storage, Freezing & Reheating Tips
Store leftover chicken cutlets in an airtight container in the refrigerator for up to 3 to 4 days. Let them cool first, but do not leave them sitting out for too long.
For best texture, store the cutlets in a single layer if possible. Stacking can soften the coating, especially while the chicken is still warm.
To freeze, let the baked cutlets cool completely. Place parchment paper between layers and freeze in a freezer-safe container or bag for up to 2 months.
Reheat in a 375°F oven or air fryer until hot and crisp. Avoid reheating covered, because trapped steam softens the coating.
The microwave works in a hurry, but it will make the breading softer. If using the microwave, finish the cutlet in a hot skillet or air fryer for a few minutes to bring back some crunch.
Make-Ahead Tips
You can slice or pound the chicken up to 24 hours ahead and store it covered in the refrigerator.
The breadcrumb mixture can be made ahead and stored in an airtight container. Keep it dry until you are ready to bread the chicken.
For best results, bread the chicken shortly before baking. Breaded raw chicken can sit in the refrigerator for a short time, but the coating may soften if it sits too long.
You can also bake the cutlets fully ahead of time and reheat them in the oven or air fryer. This is the better option for meal prep.
FAQs
How do you keep oven baked chicken cutlets crispy?
Use panko breadcrumbs, bake the cutlets on a wire rack, and lightly spray or drizzle the coating with oil before baking. The rack helps air circulate under the chicken, while the oil helps the crumbs brown and crisp.
Can I make chicken cutlets without frying?
Yes, chicken cutlets can be baked instead of fried. The key is using a hot oven, thin chicken pieces, and a breadcrumb coating that has a little oil or cooking spray. This gives you a crisp texture without deep frying.
What temperature should baked chicken cutlets be?
Baked chicken cutlets should reach 165°F in the thickest part. Because cutlets are thin, they cook quickly, so start checking near the end of the baking time to avoid drying them out.
Can I use regular breadcrumbs instead of panko?
Yes, but the texture will be different. Regular breadcrumbs create a finer coating, while panko gives a lighter and crunchier finish. For the crispiest oven baked cutlets, panko is the better choice.
Can I freeze crispy oven baked chicken cutlets?
Yes, baked chicken cutlets freeze well. Cool them completely, freeze with parchment between layers, and reheat in the oven or air fryer. The coating will be much better reheated this way than in the microwave.
More Recipes You’ll Love
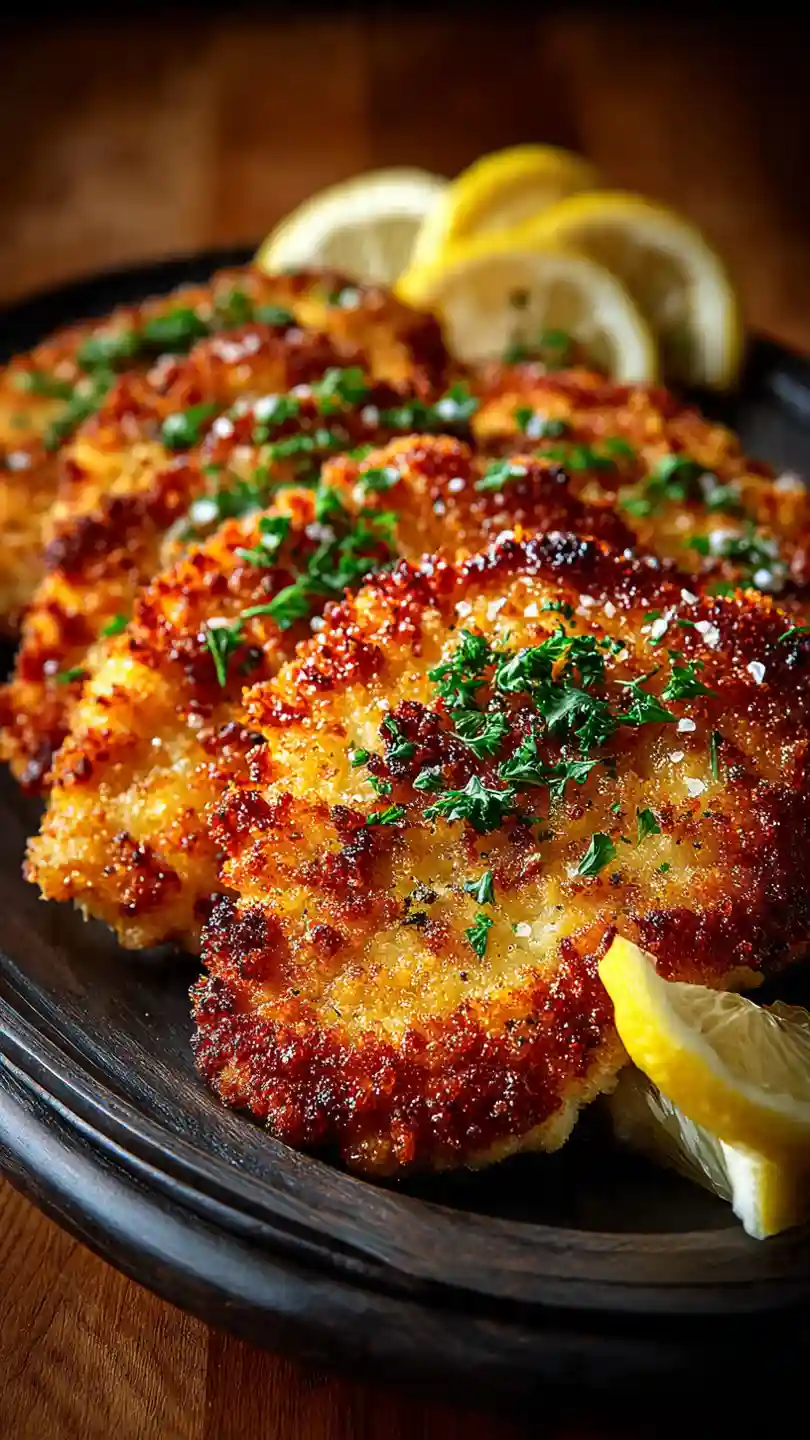
Crispy Oven Baked Chicken Cutlets
Ingredients
Method
- Preheat the oven to 425°F. Set a wire rack over a large rimmed baking sheet and lightly grease the rack.
- Pat the chicken cutlets dry with paper towels. If needed, pound them to about 1/2-inch thickness.
- Add flour to a shallow dish and season with 1/2 teaspoon salt and 1/4 teaspoon black pepper.
- In a second shallow dish, whisk together eggs and Dijon mustard.
- In a third shallow dish, mix panko, Parmesan, garlic powder, paprika, Italian seasoning, remaining 1/2 teaspoon salt, remaining 1/4 teaspoon black pepper, and olive oil.
- Dip each chicken cutlet into the flour and shake off excess.
- Dip into the egg mixture, then press into the panko mixture until evenly coated.
- Place the coated cutlets on the prepared wire rack with space between each piece.
- Lightly spray the tops with cooking spray.
- Bake for 15 to 18 minutes, or until the coating is golden and the chicken reaches 165°F in the thickest part.
- For extra color, broil for 1 to 2 minutes at the end, watching closely.
- Rest for 3 to 5 minutes before serving with lemon wedges and parsley if desired.
Notes
- Use thin, even chicken cutlets for the best texture.
- Panko breadcrumbs give a crispier coating than regular breadcrumbs.
- Do not overcrowd the rack or the chicken may steam.
- Check the chicken early because thin cutlets cook quickly.
- Reheat leftovers in the oven or air fryer for the best crunch.
- Calories: 430
- Protein: 44g
- Fat: 15g
- Carbs: 34g