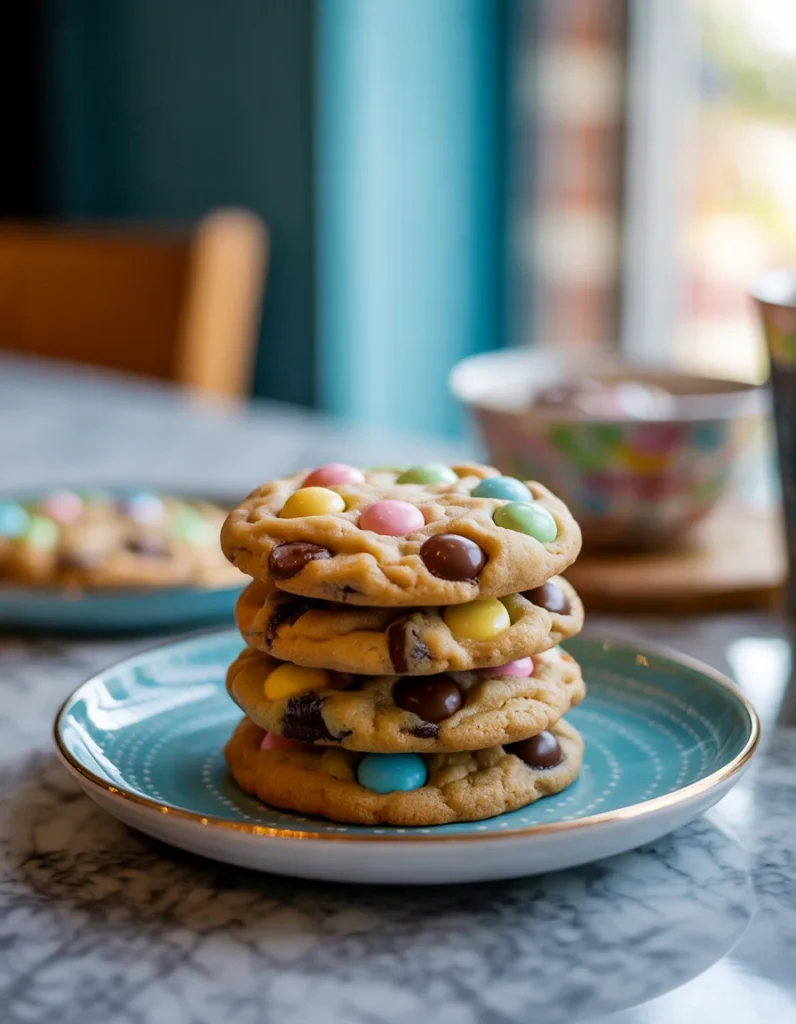
Easter Chocolate Chip Cookies (Soft, Festive & Colorful)
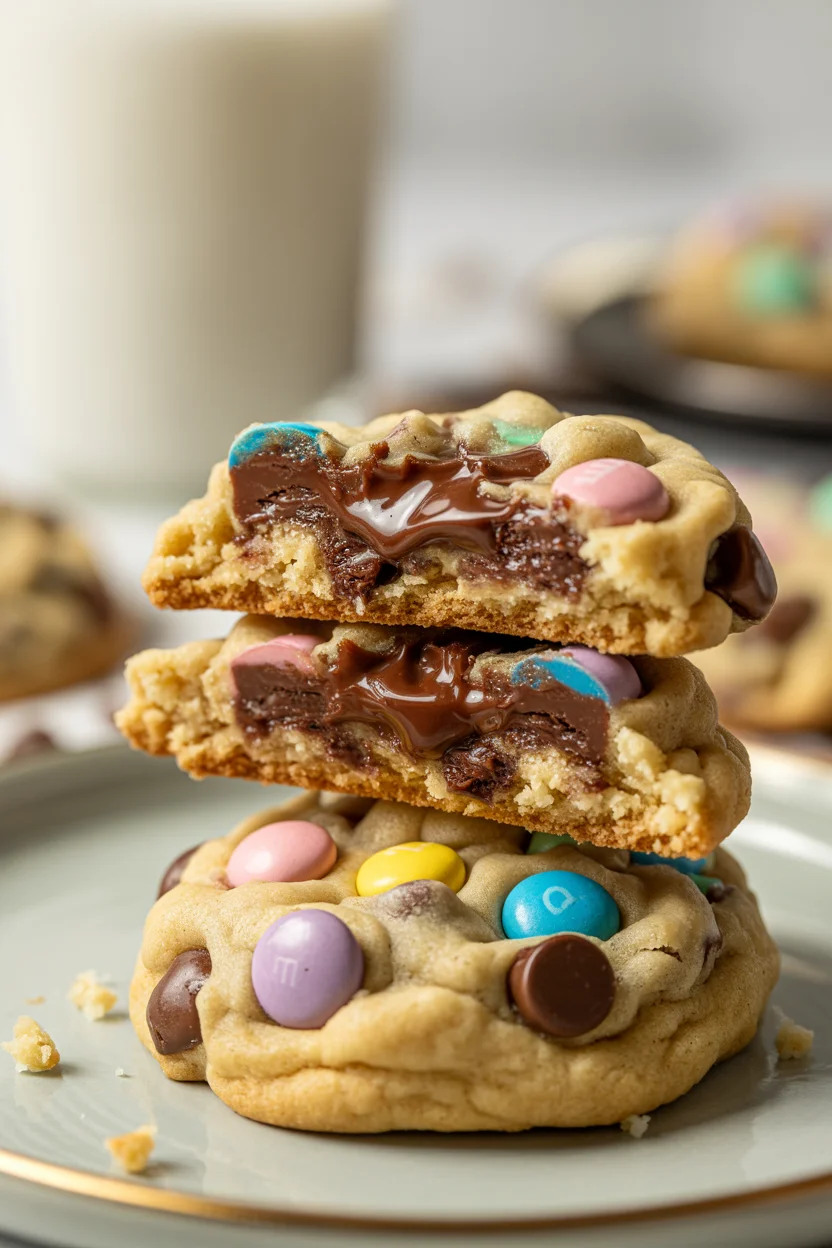
There’s just something joyful about Easter treats. Maybe it’s the pastel colors. Maybe it’s the arrival of spring. Or maybe if you’re like me. It’s just an excuse to bake cookies packed with chocolate. These Easter Chocolate Chip Cookies check all the boxes: soft, chewy, buttery, and full of melty chocolate chips and candy-coated eggs in Easter colors.
They’re the kind of cookies that kids love to help with and grownups sneak from the cooling rack. A little crisp at the edges, gooey in the middle, and loaded with texture from all those colorful candies.
They also make a beautiful addition to Easter baskets, dessert tables, or spring bake sales. You can even wrap them up with ribbon and hand them out as sweet little gifts.
This recipe gives you thick bakery-style cookies that stay soft for days. Let’s make them!
Why You’ll Love These Cookies
- Soft and chewy with crisp golden edges
- Festive look thanks to pastel M&Ms or candy eggs
- Easy to customize with nuts or different chips
- Perfect make-ahead treat for Easter week
- No chilling required (unless you want extra thick cookies!)
- Kids can help mix and decorate
- Holiday-ready and freezer-friendly
These cookies taste just as good as they look. They bake up fast and disappear even faster. Whether you’re baking for your own family or filling a cookie jar to share, they’ll be the first treat to vanish.
Step-by-Step Instructions
1. Prep Your Oven and Pans
Start by preheating your oven. Set it to 350°F (175°C) and line your cookie sheets with parchment paper or silicone mats to prevent sticking and help the bottoms bake evenly. You want everything ready to go so once your dough is mixed, you can scoop and bake without delay.
If you’re baking multiple trays, position oven racks in the upper and lower thirds of the oven and rotate them halfway through baking for even browning.
2. Cream the Butter and Sugars
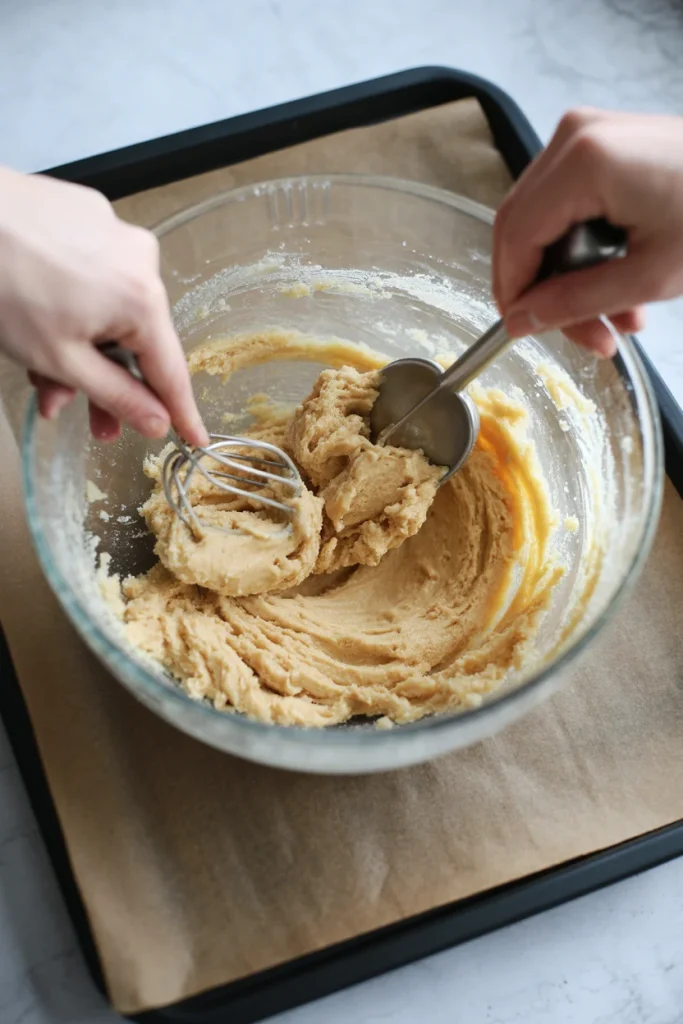
In a large mixing bowl, beat softened butter with both brown sugar and granulated sugar. This step is crucial, creaming incorporates air into the dough, making your cookies soft and light inside but crisp at the edges.
Use a stand mixer if you have one, or a handheld mixer will work just fine. Beat until the mixture turns fluffy and pale, and scrape down the sides of the bowl a couple of times to make sure nothing is stuck.
3. Add the Eggs and Vanilla
Crack in the eggs one at a time. Mix well after each addition. This helps emulsify the butter and sugar mixture and gives your dough structure.
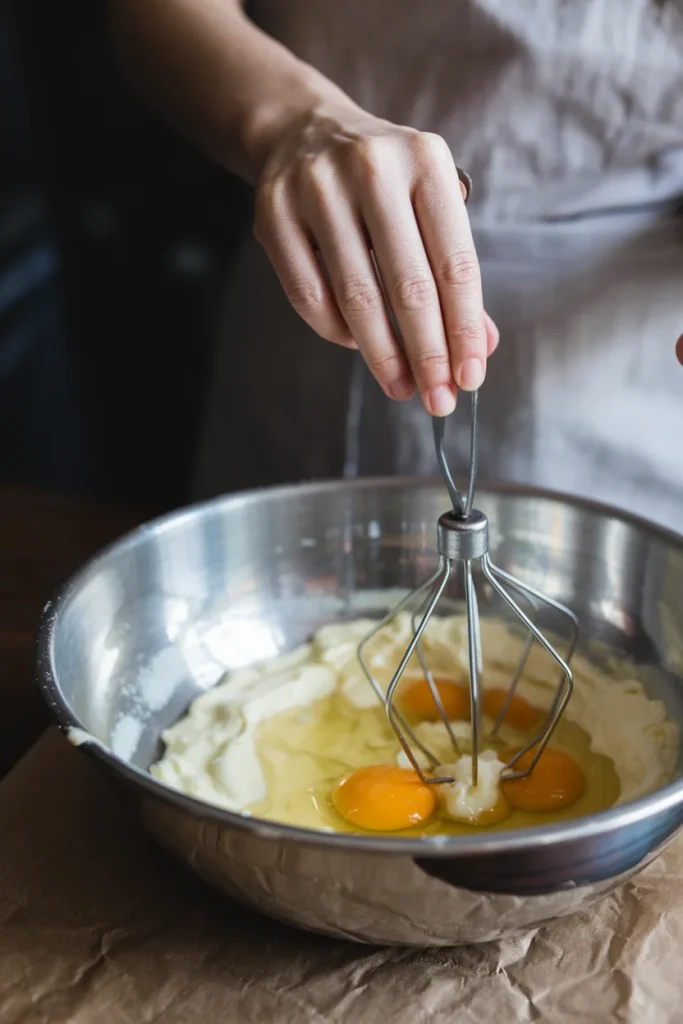
Then add the vanilla extract. A good-quality vanilla adds warmth and depth that balances the sweetness of the candy and chocolate.
4. Mix in the Dry Ingredients
In a separate bowl, whisk together your flour, baking soda, and salt. This step distributes the leavening evenly.
Gradually mix the dry ingredients into your wet mixture, stirring just until combined. Don’t overmix once the flour disappears, stop. Overworking the dough can lead to tough cookies.
Your dough should be thick and hold its shape when scooped.
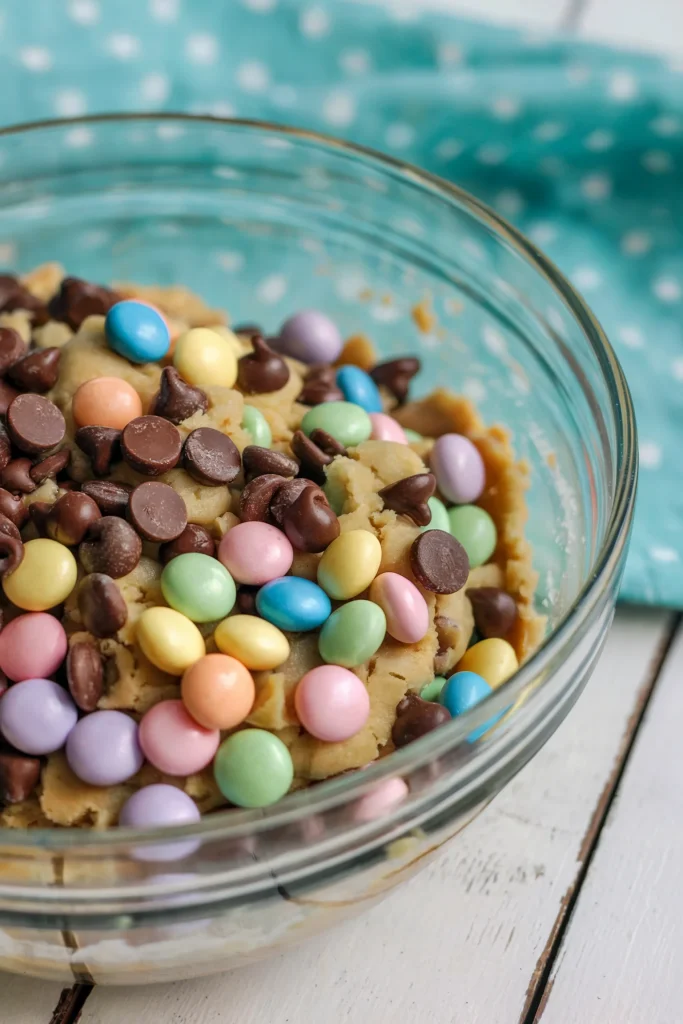
5. Fold in Chocolate Chips and Easter Candies
This is where the cookies become festive. Fold in plenty of semi-sweet chocolate chips and pastel-colored M&Ms or crushed candy-coated chocolate eggs. You can also mix in white chocolate or milk chocolate chips if you want more variety.

Save some of the candies to press into the tops of the cookies before they go in the oven this makes them picture-perfect.
If you want extra crunch or texture, you can also stir in chopped pecans or walnuts at this point.
6. Scoop and Bake
Use a medium cookie scoop or two spoons to form balls of dough about 2 tablespoons in size. Place them a couple of inches apart on the prepared pans, they will spread slightly as they bake.
Bake the cookies for about 9-11 minutes, or until the edges are golden and the centers still look soft. Don’t overbake! They’ll continue to cook slightly on the tray after coming out of the oven.
If your kitchen is warm or you like thicker cookies, chill the dough for 30-60 minutes before baking. This helps control spreading.
7. Cool and Decorate
Let the cookies cool on the baking sheet for 5 minutes, then transfer them to a wire rack to cool completely. While they’re still warm, gently press in a few extra M&Ms or mini eggs on top.
The candies will set into the surface, giving your cookies that bakery look golden, chewy, and dotted with Easter pastels.
Tips for Success
- Use room temperature butter for easier creaming
- Measure your flour correctly (spoon and level method)
- Don’t overbake soft centers make the best chewy cookies
- Add extra candies on top before and after baking
- For bakery-style thickness, chill the dough for 30–60 minutes
- Use a cookie scoop for even portioning and uniform size
Fun Variations
| Twist | How to Do It |
|---|---|
| Double Chocolate | Add 1/4 cup cocoa powder and use white chips |
| Nutty Delight | Mix in chopped walnuts or pecans |
| Mini Egg Magic | Use crushed Cadbury Mini Eggs instead of M&Ms |
| Sprinkle Party | Add pastel jimmies or Easter sprinkles |
| Peanut Butter Surprise | Mix in PB chips or chopped mini PB cups |
Make-Ahead & Storage
Once baked, the cookies stay soft for up to 5 days when stored in an airtight container at room temperature. They can also be frozen after baking. Just let them cool fully, then pack in freezer bags or containers for up to 3 months.
Want to prep ahead? Freeze unbaked dough balls on a tray until solid, then transfer to a zip-top freezer bag. You can bake them directly from frozen. Just add an extra minute or two to the bake time.
These cookies are great for gifting, shipping, or making ahead for a busy Easter weekend.
A Sweet Easter Memory
Growing up, Easter meant chocolate bunnies, egg hunts in the backyard, and my mom’s famous sugar cookies with frosting. But one year, she surprised us with chocolate chip cookies speckled with pastel M&Ms.
They were warm, melty, and cheerful. We ate them under the blooming dogwood tree after dyeing eggs all afternoon. That little change from the usual frosted cookies turned into a tradition. Now, every spring, I bake a big batch of these Easter cookies with my kids. We stir the dough, sneak candy pieces, and laugh as the house fills with the smell of vanilla and butter.
It’s simple moments like these that make recipes more than just food. They become memories.
FAQs
Can I use different types of Easter candy?
Yes! Pastel M&Ms and Cadbury Mini Eggs are the most popular, but you can also chop up chocolate bunnies, use malted robin eggs, or even toss in some crushed jelly beans (for chewy surprises). Just be sure the candy you use is oven-safe if baking directly into the dough.
Do I really need to chill the dough?
No, but it depends on your goal. If you want soft, slightly spread-out cookies, bake the dough right away. If you prefer thicker, puffier cookies, chilling the dough for 30-60 minutes helps control spreading and deepens the flavor slightly.
Can I freeze these cookies?
Yes, both before and after baking. For unbaked cookies, scoop the dough into balls, freeze on a baking sheet, then store in freezer bags. Bake directly from frozen, just adding a minute or two to the bake time. Baked cookies can also be frozen for up to 3 months in airtight containers.
How long do these cookies stay fresh?
Stored in an airtight container at room temperature, they’ll stay soft for up to 5 days. To keep them even fresher, toss a slice of white bread into the container. It helps maintain moisture.
Can I make these gluten-free?
Absolutely! Use a 1:1 gluten-free flour blend like King Arthur or Bob’s Red Mill. The texture may vary slightly, so you may want to chill the dough briefly before baking for better structure.
How do I keep the candies from cracking in the oven?
Press most of your candies into the tops of the cookies right after baking instead of mixing them all into the dough. This keeps their colors vibrant and helps them stay whole and glossy.
Are these cookies good for gifting or mailing?
Definitely. Once cooled, they hold their shape well and don’t crumble easily, making them perfect for Easter gift boxes or care packages.
Conclusions
These Easter Chocolate Chip Cookies are more than just cute spring treats. They’re soft, buttery, chocolatey, and festive enough to make anyone smile. Whether you’re making them with kids, baking ahead for guests, or just treating yourself, this recipe always hits the sweet spot.
Bright colors, rich chocolate, and soft-baked goodness—this is the kind of recipe that becomes a yearly tradition. So gather your pastel candies and your favorite mixing bowl, and bake something worth celebrating.
Easter Chocolate Chip Cookies
Ingredients
Method
- Preheat oven to 350°F (175°C). Line baking sheets with parchment paper or silicone mats.
- Cream butter and sugars in a large mixing bowl until light and fluffy (about 2 minutes).
- Add eggs one at a time, beating well after each. Stir in vanilla extract.
- In a separate bowl, whisk together flour, baking soda, and salt.
- Gradually mix dry ingredients into the wet mixture just until combined. Don’t overmix.
- Fold in chocolate chips and most of the Easter candies, reserving some for topping.
- Scoop dough into 2-tablespoon-sized balls and place 2 inches apart on baking sheets.
- Press a few extra M&Ms or mini eggs on top of each dough ball for a colorful finish.
- Bake for 9–11 minutes, or until edges are golden and centers are just set.
- Cool on the baking sheet for 5 minutes, then transfer to a wire rack to cool completely.
Notes
- Chilling the dough for 30–60 minutes yields thicker, puffier cookies but is optional.
- Swap in white chocolate chips or chopped mini peanut butter cups for fun variations.
- To freeze: scoop dough onto a tray, freeze solid, then store in a zip bag for up to 3 months.
- These cookies ship well — perfect for gifting or Easter care packages.