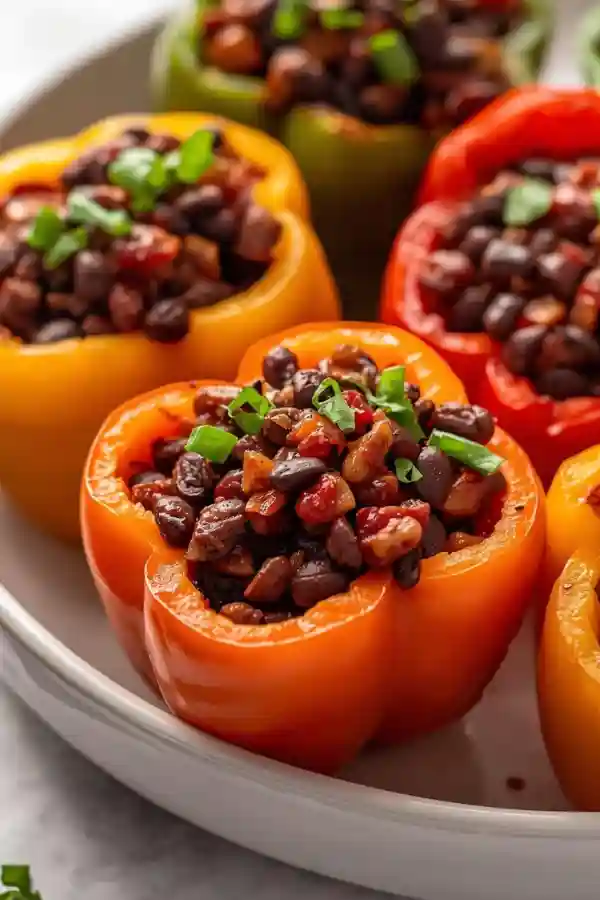
Black Bean Stuffed Peppers
Black Bean Stuffed Peppers are one of those meals that prove vegetarian food doesn’t have to feel like a compromise. They’re hearty, filling, and packed with bold flavor no meat needed. I love making these when I want something comforting but still fresh and colorful.
The peppers get tender, the filling turns rich and saucy, and the cheese on top pulls everything together.
This recipe works just as well for a casual weeknight dinner as it does for meal prep, and even meat-eaters usually go back for seconds. If you’re looking for a reliable, feel-good dinner, this one earns a permanent spot.

Why You’ll Love This Recipe
- Naturally vegetarian and budget-friendly
- High in fiber and plant-based protein
- Easy to customize with spices and toppings
- Great for meal prep and leftovers
- Comforting but still fresh and colorful
Kitchen Equipment You’ll Need
- Baking dish
- Mixing bowl
- Saucepan or skillet
- Knife
- Cutting board
- Spoon
Step-by-Step Instructions
1. Prep the Peppers
Preheat your oven to 375°F (190°C). Slice the bell peppers in half lengthwise and remove seeds and membranes. Arrange them cut-side up in a lightly greased baking dish.
Tip: Red and yellow peppers add sweetness that balances the savory filling.
2. Cook the Black Bean Filling
Heat a skillet over medium heat. Add a little oil, then sauté onion and garlic until soft. Stir in black beans, cooked rice, diced tomatoes, cumin, chili powder, salt, and pepper. Let it simmer for 3–5 minutes until everything is well combined and slightly thickened.
Swap idea: Use quinoa instead of rice or cauliflower rice for a low-carb option.
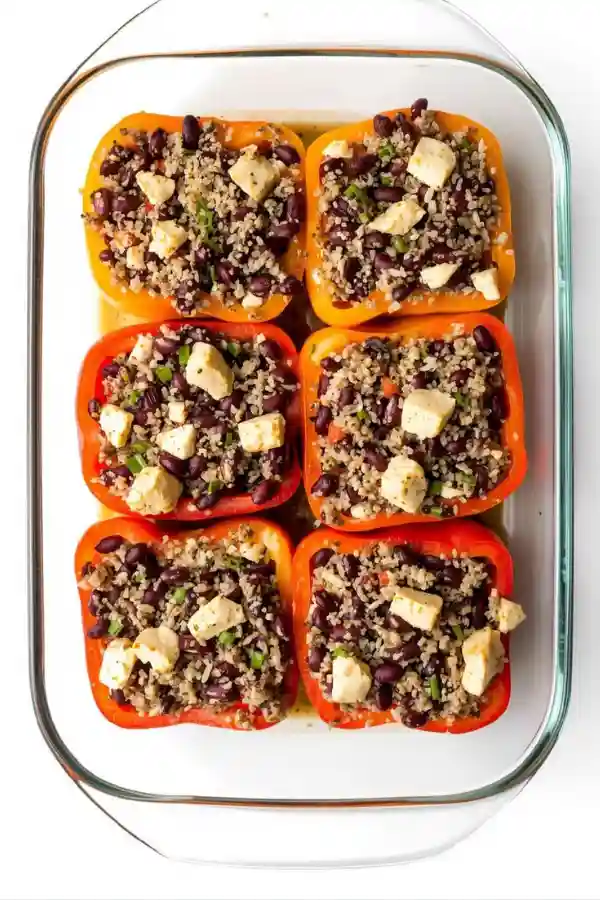
3. Stuff the Peppers
Spoon the black bean mixture evenly into each pepper half. Press gently so the filling stays put but don’t pack it too tightly.
4. Bake Until Tender
Cover the dish loosely with foil and bake for 25 minutes. Remove foil, sprinkle cheese over each pepper, and bake uncovered for another 8–10 minutes until the cheese is melted and the peppers are tender.
Mistake to avoid: Skipping the foil step can dry out the peppers before they soften.
5. Rest and Garnish
Let the peppers rest for about 5 minutes. Top with fresh cilantro, green onions, or a dollop of sour cream before serving.
Storage & Serving Tips
- Refrigerate: Store leftovers in an airtight container for up to 4 days.
- Reheat: Warm in the oven at 350°F or microwave until heated through.
- Serving ideas: Serve with a side salad, tortilla chips, or avocado slices.
FAQs
Are black bean stuffed peppers filling enough for dinner?
Yes, the beans and rice make them very satisfying.
Can I make these vegan?
Absolutely—just skip the cheese or use a plant-based version.
Can I freeze black bean stuffed peppers?
Yes, freeze after baking and cool completely before storing.
What spices work well in this recipe?
Cumin, smoked paprika, and taco seasoning all work well.
Can I make them without rice?
Yes, replace rice with extra beans, veggies, or cauliflower rice.
Black Bean Stuffed Peppers
Ingredients
Method
- Preheat oven to 375°F (190°C). Place prepared peppers in a baking dish.
- Heat oil in a skillet and sauté onion and garlic until soft.
- Stir in black beans, rice, tomatoes, spices, salt, and pepper. Simmer briefly.
- Fill peppers evenly with the mixture.
- Cover with foil and bake for 25 minutes.
- Remove foil, add cheese, and bake 8–10 minutes until melted.
- Rest briefly, garnish, and serve.
Notes
- Easily made vegan by using dairy-free cheese or skipping cheese altogether.
- Add corn or chopped spinach for extra texture and color.
- Great for make-ahead lunches.